Tests
After setting up samples, you can configure the tests you want to report on. Then, those samples and tests will appear in your reports.
Configuration
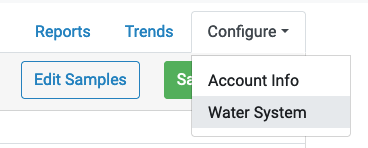
To set up tests for your account, navigate to “Configure” > “Water System”:

Then, you’ll see a grid of checkboxes:

Along the top, each sample is listed; down the left side, each test is listed. For each test, check the checkbox if you want to report that test for the sample named above.
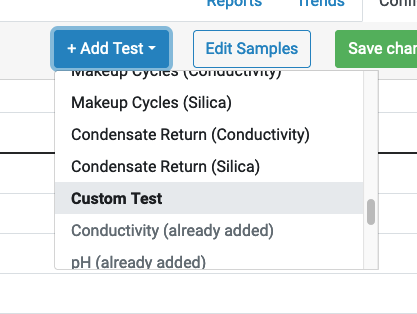
Here, you can also delete tests from the report or use the “Add Test” link to add new tests to your report.
There are three kinds of tests in Aqualytics:
Built-in Tests
Aqualytics supports several tests out-of-the-box. If you need to report something that isn’t on this list, you can use a custom tests.
The built-in tests are:
- Conductivity (µS/cm)
- Silica (ppm)
- Chloride (ppm)
- pH
- M-Alkalinity
- P-Alkalinity
- Total Hardness (ppm CaCO₃)
- Calcium Hardness (ppm CaCO₃)
- Molybdenum (ppm)
- Orthophosphate (ppm)
- Polyphosphate (ppm)
- Organophosphate (ppm)
- Iron (ppm)
- Copper (ppm)
- Sulfite (ppm)
- Nitrite (ppm)
- PTSA (ppb)
- Total Suspended Solids (ppm)
- Water Meter
- Pressure (psi)
- Temperature (°F)
- Target Cycles
- Max Skin Temp (°F)
(Some of these aren’t tests, per se, but are inputs for calculations)
Do you have a suggestion for another built-in test that should be added to Aqualytics? Let us know at hello@aqualyticsreports.com!
Custom Tests
You can add a custom test from the “Add Test” button:

After that, you can give your custom test a name and assign it to some of your samples:

Calculations
Aqualytics can calculate values in your reports. The built-in calculations are:
- Magnesium Hardness
- Cycles (Conductivity)
- Cycles (Silica)
- LSI
- Feedwater Cycles (Conductivity)
- Feedwater Cycles (Silica)
- Makeup Cycles (Conductivity)
- Makeup Cycles (Silica)
- Condensate Return (Conductivity)
- Condensate Return (Silica)
When you add a calculation to your reports, you can see the formula by hovering over the calculator icon:

If you want to add a custom calculation to your reports, add a custom test and enter your calculated value there.